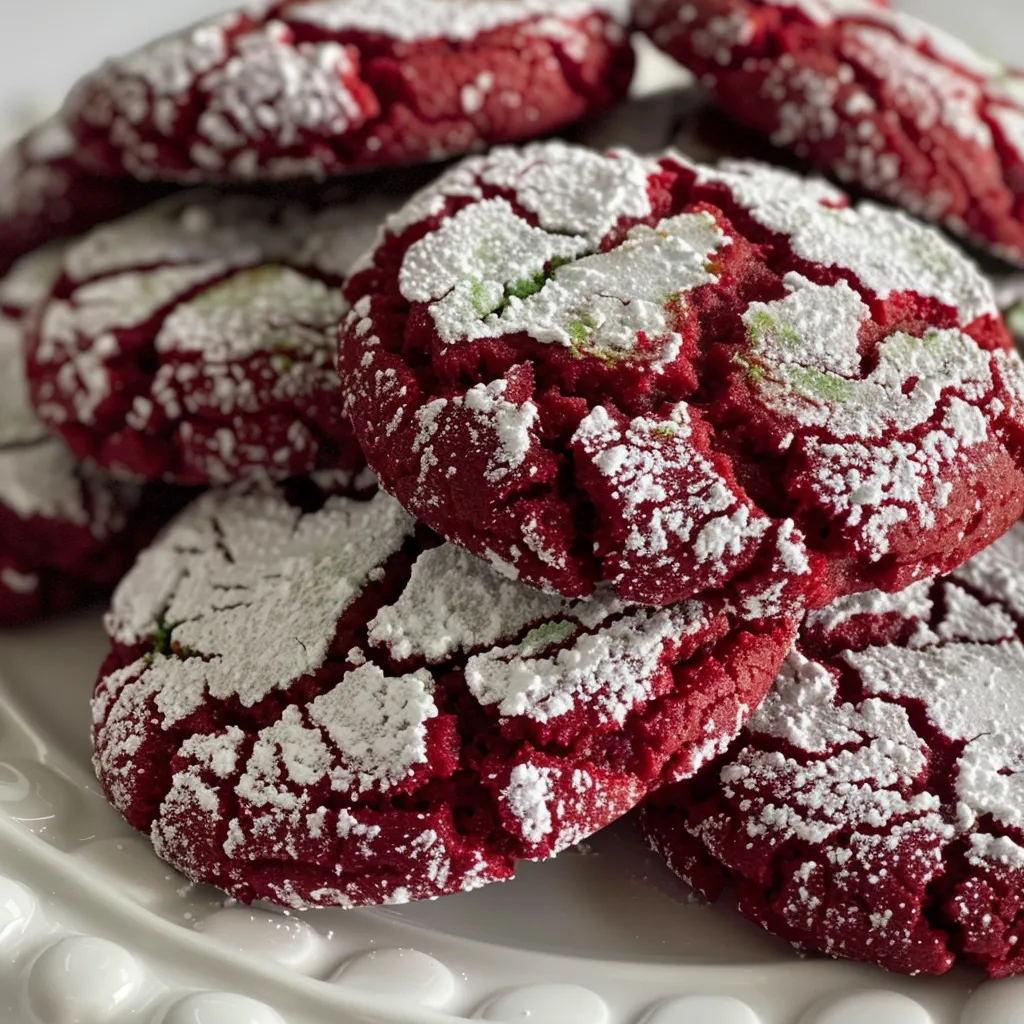
Hey there, cookie lovers! If you’re anything like me, you know that the best part of any gathering isn’t just the company but the scrumptious treats that bring everyone together. And let me tell you, nothing steals the show quite like these festive Red Velvet Crinkle Cookies! With their rich, fudgy texture and that stunning red hue, they’re like little bites of joy that just scream celebration. Picture this: you walk into a room, and the aroma of warm cookies hits you, instantly putting a smile on your face. It’s the kind of magic that only baking can create! Plus, they’re a bit messy, which is just part of the fun, right? So, grab your apron and let’s get ready to spread some cookie cheer!
Why You’ll Absolutely Love This Red Velvet Crinkle Cookies – Festive and Fudgy
These cookies aren’t just delicious; they’re a delightful experience! Here’s why you’re going to be obsessed with them:
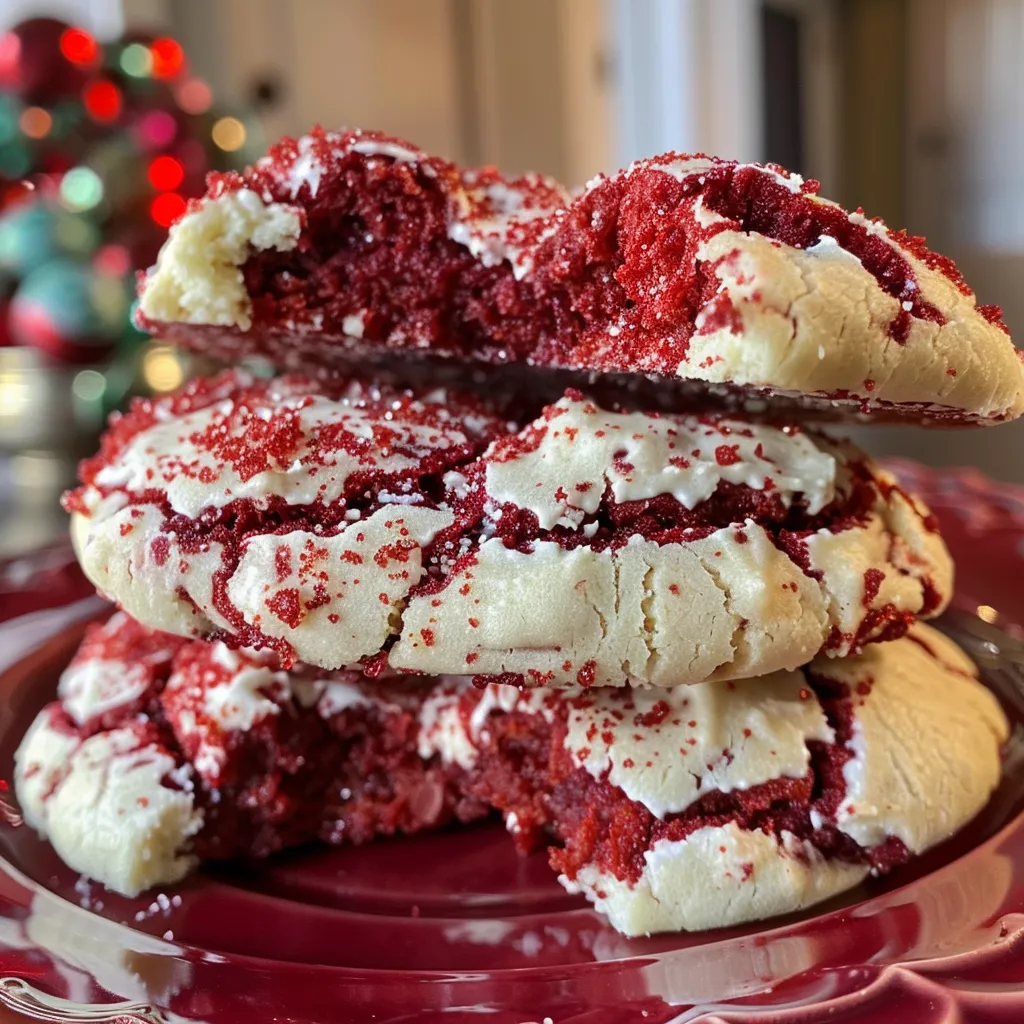
- They’re perfectly fudgy and chewy, with a soft center that melts in your mouth.
- They make for a stunning presentation – the deep red color and powdered sugar coating are totally Instagram-worthy!
- The recipe is simple and fun, making it perfect for baking with friends or family.
- They can be enjoyed for any occasion, from Christmas gatherings to Valentine’s Day treats!
Ingredients You’ll Need
Now, let’s talk ingredients! These are the stars of our show, and each one plays a vital role in creating the ultimate Red Velvet Crinkle Cookies:
- 1 cup all-purpose flour: The backbone of our cookies, providing structure.
- 1/4 cup unsweetened cocoa powder: Because what’s a red velvet cookie without a hint of chocolate?
- 1/2 teaspoon baking powder: To help our cookies rise and get that fluffy texture.
- 1/4 teaspoon baking soda: A little extra lift to make them perfectly puffy.
- 1/4 teaspoon salt: A pinch to enhance all those sweet flavors!
- 1/2 cup granulated sugar: For that classic sweetness.
- 1/4 cup brown sugar, packed: Adds moisture and a hint of caramel flavor.
- 1/2 cup unsalted butter, softened: The magic ingredient that brings everything together.
- 1 large egg: Helps bind our ingredients and adds richness.
- 1 tablespoon red food coloring: Because we want that vibrant red color that makes these cookies stand out!
- 1 teaspoon vanilla extract: A splash of vanilla for that warm, comforting flavor.
- 1/2 cup powdered sugar for coating: To create that signature crinkle effect!
You’ll find the full ingredient list with measurements in the recipe card below!
How to Make This Red Velvet Crinkle Cookies – Festive and Fudgy, Step-by-Step
Alright, let’s get baking! Follow these steps, and you’ll have cookies that will make your heart sing:
- Preheat your oven to 350°F (175°C) and line a baking sheet with parchment paper. This helps with easy cleanup and prevents sticking!
- In a medium bowl, whisk together the flour, cocoa powder, baking powder, baking soda, and salt. This ensures that all your dry ingredients are evenly mixed.
- In another large bowl, cream together the granulated sugar, brown sugar, and softened butter until light and fluffy. Use a hand mixer or stand mixer for the best results!
- Beat in the egg, red food coloring, and vanilla extract until everything is well combined. You’ll love that vibrant color!
- Gradually add the dry ingredients to the wet ingredients, mixing until just combined. Don’t overmix; a little bit of flour peeking through is totally okay!
- Chill the dough in the refrigerator for about 30 minutes. This helps the cookies maintain their shape and enhances the flavors.
- Using a cookie scoop or tablespoon, form the dough into balls and roll them generously in powdered sugar. This is where the magic happens!
- Place the dough balls on the prepared baking sheet, spacing them about 2 inches apart. They’ll spread out a bit while baking.
- Bake for 10-12 minutes, or until the edges are set but the centers are still soft. They will continue to cook a little after you take them out, so don’t overdo it!
- Allow to cool on the baking sheet for a few minutes before transferring to a wire rack to cool completely. Patience is key here, but the smell will be worth the wait!
Pro Tips for the Best Results
Want to ensure your cookies are the star of the show? Here are my top tips:
- Make sure your butter is softened but not melted for the best texture – think creamy, not soupy!
- Don’t skip the chilling step! It’s crucial for achieving those beautiful crinkles and chewy centers.
- Feel free to sprinkle a little sea salt on top before baking for that sweet-salty contrast that makes these cookies irresistible!
Serving Suggestions
These cookies are delicious on their own, but let’s elevate the experience a bit! Here are some serving suggestions:
- Serve them warm with a scoop of vanilla ice cream for a decadent dessert sundae.
- Pair with a cup of hot cocoa or coffee for the ultimate cozy vibe.
- Stack them up on a festive plate and gift them to friends or neighbors for a sweet surprise!
Storage and Make-Ahead Tips
Want to save some cookies for later? No problem! Here’s how to keep your cookies fresh:
- Store baked cookies in an airtight container at room temperature for up to 5 days. If they last that long!
- You can freeze the dough balls before baking! Just roll them in powdered sugar and freeze on a baking sheet, then transfer to a freezer bag. Bake straight from the freezer, adding an extra minute or two to the baking time.
- For an even more festive touch, decorate with white chocolate drizzle or red sprinkles!
And there you have it, my delightful friends! A recipe for Red Velvet Crinkle Cookies that’s not just about baking; it’s about creating joy, laughter, and delicious memories. So, roll up your sleeves, embrace the mess, and let’s make some cookie magic happen! Happy baking!

Red Velvet Crinkle Cookies – Festive and Fudgy
Ingredients
Method
- Preheat oven to 350°F (175°C) and line a baking sheet.
- Mix dry ingredients; cream sugars and butter, then add egg, food coloring, and vanilla.
- Combine wet and dry; chill dough 30 minutes.
- Form dough into balls, roll in powdered sugar, and place on sheet.
- Bake 10-12 minutes; cool before serving.
Notes
Loved this recipe? Save it to your favorite Pinterest board so you can easily find it later! It’s the perfect way to keep all your sweet ideas in one place. ✨